
With the release of Checkfront 3.5, we’ve included a very highly requested feature: accounts for customers, enabling them to log in and manage their own bookings and contact information. It’s extraordinarily useful for businesses who see repeat customers, and there’s a lot of added functionality on both the front and back ends. Here’s a breakdown of how you can use customer accounts.
Checkfront user options
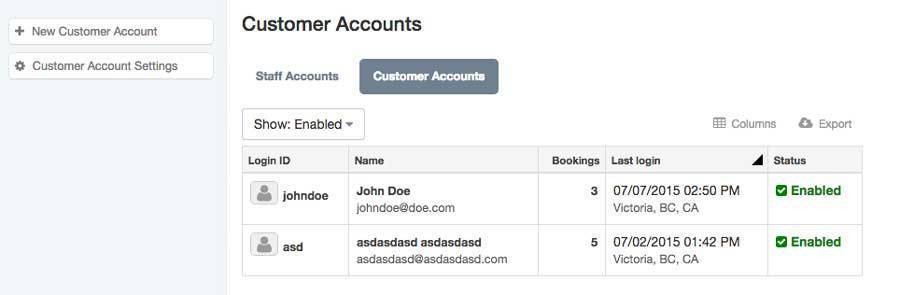
All customer account seettings are found by going to Manage > Accounts > Customer Accounts; here you can see and control all of the accounts associated with your business. Clicking on an account’s ID will bring you to the ‘Edit Customer Account’ page, where you can see their basic information, enable or disable their account, and view the customer’s bookings. You are also able to create new customer accounts in this menu by clicking on the ‘New Customer Account’ button in the left-hand sidebar.
Customer account settings
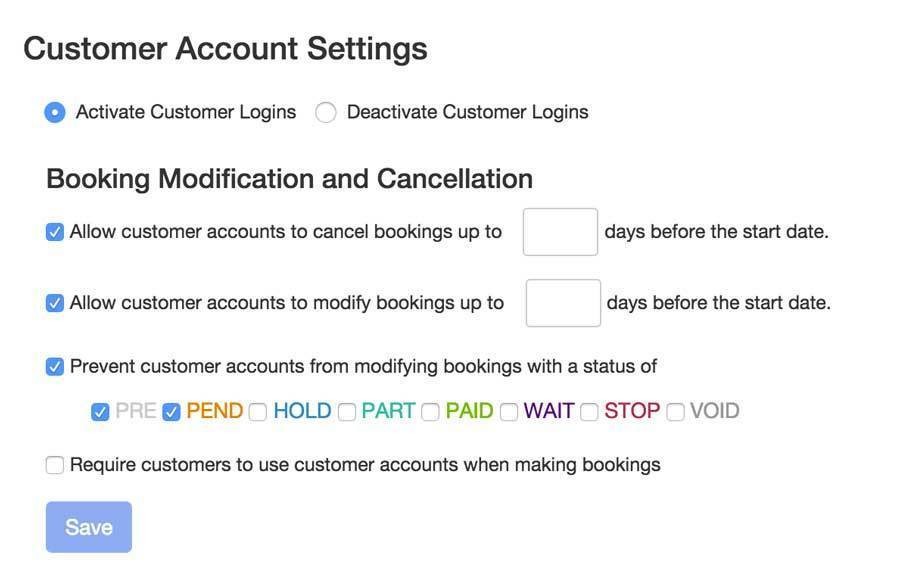
By clicking ‘Customer Account Settings’ in the left-hand sidebar, you will be taken to the settings page for this feature. Here you can activate or deactivate customer accounts altogether, as well as determine the cutoff date for customer cancellations and modifications and prevent customers from modifying bookings with certain statuses. There is also an option which will make customer accounts mandatory in order to make a booking.
Attribution
If a customer makes a booking but forgets to log in, you can now attribute that booking to their account. To activate this handy little feature, go to your booking index and click on the reservation in question, then on ‘Edit’. You will see an option in the sidebar to ‘Attribute to Customer Account’; if you click on it, you can select the correct account from the dropdown. Once you’ve attributed an account to a customer, they will be able to see it when they are logged in and make changes/cancellations freely.
Customer options
Customers can create an account by clicking the ‘Log In’ button which will appear on the top right-hand side of your booking page, then on the ‘Create Account’ link. Once they have an account and are logged in, their name will appear on the top of the booking page with drop-down options to go to their profile or to log out.
Bookings tab
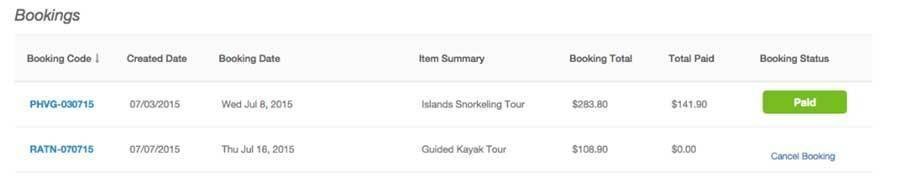
In this tab, customers can see the bookings they have made and a history of their purchases. This includes the date created, the booking date, item summary, booking total, paid total, and booking status. If you’ve given them permission to do so, a customer may cancel a booking by clicking ‘Cancel booking’ underneath the status button. If they click on the booking code, they will enter into the invoice screen and be able to edit the reservation by clicking ‘Edit this booking’. They can add items, edit quantities of existing items, apply promo codes, and edit information on the booking form associated with that particular reservation.
Account and saved information tabs
The account tab is pretty basic; it shows the information the customer provided when they signed up, including their username, email, and password. They can change their password in this tab and update any of the other fields (other than their username, which cannot be changed once the account has been created).
However, the Saved Information tab is quite useful for repeat customers. This tab allows customers to fill out all the information that’s normally on your booking tab—name, email, address, and any custom booking form fields you’ve created. The next time a customer makes a booking while logged in, they can click ‘Autofill’ when they get to the booking form step, and the form will populate itself with this saved information—quick, easy, and very convenient.

Start your free 21-day trial!
Online bookings. Flexible pricing. Outstanding support.